Why Indoor Paint Keeps Lifting From Walls

Why Indoor Paint Keeps Lifting From Walls

Find out why interior paint can lift, crack or flake, how moisture and poor preparation cause it, and what a lasting repair needs before repainting indoors.

Fresh paint should sit smoothly and firmly on a wall. When it starts lifting, flaking or coming away in patches, the problem is rarely just the top coat. It is usually a sign that moisture, surface contamination, poor preparation or an incompatible coating is affecting the bond underneath.

For Melbourne property owners, this can be especially frustrating in bathrooms, kitchens, laundries, older homes and buildings with limited ventilation. Painting over the visible damage might improve the look briefly, but it will not fix the cause. A lasting result starts with identifying why the paint has failed in the first place.

Why indoor paint keeps lifting from walls

Paint adheres properly when the surface is clean, dry, sound and correctly prepared. If one of those conditions is missing, the coating can lose its grip over time. The exact cause depends on the room, the age of the property, the materials used and whether there has been water damage or previous repair work.

Moisture behind or on the wall

Moisture is one of the most common causes of interior paint failure. Steam from showers, cooking and clothes drying can build up in poorly ventilated spaces. Condensation then settles on cold walls and ceilings, gradually weakening the paint film.

A more serious issue is water entering from behind the surface. This may come from a leaking pipe, failed waterproofing, a roof leak, damaged external seals or rising damp in an older property. If paint is bubbling, soft to touch, stained or lifting in one concentrated area, moisture should be investigated before any repainting begins.

A bathroom wall, for example, may look dry on the surface while moisture remains trapped in the plasterboard or behind tiles. Painting over it too soon can lead to the same issue returning quickly. The area needs time to dry properly, and the source of the water needs to be addressed first.

Inadequate preparation before painting

A good finish depends heavily on what happens before the first coat goes on. Dust, grease, soap residue, cooking oils, smoke film and household cleaning products can all stop paint from bonding as it should.

This is common in kitchens, around light switches, near heaters and on walls that have been cleaned with shiny residue-leaving products. Even a wall that looks clean may need washing with the right preparation product, followed by rinsing and drying, before it is ready for paint.

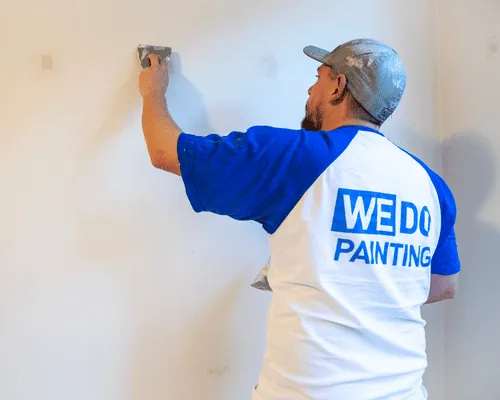
Loose or chalky old coatings also need attention. If the existing finish is failing, new paint will only be attached to an unstable layer. Proper preparation may involve scraping back loose material, sanding edges smooth, repairing damaged plaster and sealing the surface before applying a suitable undercoat.

The wrong paint system for the room

Not all interior paints are designed for the same conditions. Standard wall paint may not hold up well in a bathroom, laundry or busy commercial washroom where humidity, cleaning and surface contact are frequent.

High-moisture rooms generally need a durable, washable paint system designed to resist mould growth and cope with regular condensation. Ceilings can also need a different product from walls, particularly where steam rises and settles.

Compatibility matters too. Some older surfaces may have been coated with oil-based enamel, glossy paint or an unknown product. Applying a water-based coating directly over a glossy or poorly prepared finish can cause adhesion problems. In these situations, sanding and using the correct primer can make the difference between a short-term touch-up and a finish that lasts.

Painting over damp plaster or recent repairs

Plaster repairs, patched holes and newly set compounds need adequate drying time. This is particularly important during Melbourne’s cooler, wetter months, when indoor drying can take longer than expected.

If paint is applied before a repair is fully dry, moisture can be trapped under the coating. The result may be bubbling, cracking or a patchy sheen as the wall continues to dry. A repaired area should be allowed to cure, sanded properly, dusted down and sealed where required so it absorbs paint evenly.

The same principle applies after water damage. Even when a stain has dried, the wall or ceiling cavity may still contain moisture. A moisture assessment may be needed before repair and repainting work begins.

Poor ventilation and everyday condensation

Not every moisture issue is caused by a leak. In many homes, everyday living creates enough humidity to affect paint over time. Long hot showers, cooking without an exhaust fan, drying washing indoors and keeping rooms closed up can all increase condensation.

Look for warning signs around windows, external corners, ceilings and behind furniture. Mould spots, musty smells and water droplets on glass often point to a ventilation problem rather than a painting problem alone.

Better airflow can protect the finish after the room is repainted. Run exhaust fans during and after showers, use rangehoods when cooking, open windows where practical and avoid pushing large furniture tightly against cold external walls. For property managers and commercial operators, regular ventilation checks are a practical part of ongoing maintenance.

Movement, cracks and surface damage

Buildings move slightly with temperature changes, settling and seasonal conditions. Fine cracks can appear around doors, windows, cornices and plaster joins. When movement affects the paint film, it may crack or separate along those lines.

Small, stable cracks can often be prepared and repaired before painting. Wider cracks, repeated cracking or damage around a ceiling may need closer investigation, especially if there are signs of moisture or structural movement. The right repair depends on what is causing the crack, not just how it looks from the room.

How to repair lifting paint properly

The first step is to stop the cause, whether that is a plumbing leak, condensation, poor ventilation or a surface preparation issue. Once the area is dry and stable, all loose material should be removed back to a firm edge. This is not the time for a quick coat over the top.

The exposed area is then sanded smooth, cleaned thoroughly and repaired if the plaster underneath is damaged. A suitable sealer or primer helps create an even surface and improves adhesion. The final paint system should match the room and the existing substrate, with enough drying time between coats.

There is a trade-off here. A simple touch-up may cost less upfront, but it can look uneven and fail again if the underlying issue has not been fixed. A more thorough repair takes longer, particularly where drying or water investigation is needed, but it protects the appearance of the room and reduces repeat maintenance.

When professional help is worthwhile

Call in an experienced painter or maintenance professional when the affected area is large, keeps returning, has water staining, shows mould growth or involves high ceilings and difficult access. It is also worth getting advice before repainting a bathroom, laundry, commercial kitchen or older property where previous coating types are uncertain.

A professional assessment can identify whether the issue is limited to paint preparation or whether plumbing, waterproofing, ventilation or plaster repairs are needed first. This coordinated approach is particularly useful for rental properties, offices and facilities where repeated disruption is costly.

At WE DO Painting, the focus is on preparing surfaces properly and selecting finishes that suit the conditions of the space. A clean, durable result is built well before the final coat goes on.

If paint is lifting indoors, treat it as useful information from the building. Find the cause, allow the surface to dry and stabilise, then repair and repaint with the right system. That is how walls stay looking cared for long after the work is complete.