How to Fix Peeling Paint Properly

How to Fix Peeling Paint Properly

Learn how to fix peeling paint properly with practical prep, repair and repainting steps that improve finish, durability and surface protection.

A wall that starts flaking a few months after painting is usually telling you something went wrong before the topcoat ever dried. If you want to know how to fix peeling paint properly, the answer is rarely just adding another coat. The finish has to be stable underneath, or the same problem will come back.

In homes, shops and commercial spaces, this issue usually comes down to poor preparation, moisture, incompatible products or painting over a weak surface. The right fix depends on the cause. A small area around a window frame needs a different approach from a bathroom ceiling, an exterior weatherboard or a high-traffic tenancy wall.

Why paint starts peeling in the first place

Paint loses its grip when it can no longer bond to the surface below. That can happen because the original surface was dusty, glossy, damp, chalky or damaged. It can also happen when old paint has already started failing and new paint gets applied over the top.

Moisture is one of the biggest culprits. Bathrooms, laundries, kitchens and exterior walls exposed to weather are common trouble spots. If water is getting in from a roof issue, leaking pipe, failed sealant or poor ventilation, repainting alone will not solve it. You might improve the look for a short time, but the failure will return.

Surface condition matters just as much. Paint applied over grease, smoke residue, mould, powdery render or glossy enamel often struggles to hold. In older properties, you can also find layers of different coatings built up over time. If one layer is unstable, the new finish is only as strong as the weakest one underneath.

How to fix peeling paint without it coming back

A proper repair starts with testing how far the failure goes. Press the edge of a scraper under the loose area and see whether the paint lifts easily beyond the visible damage. If it keeps releasing, the affected section is larger than it first looked.

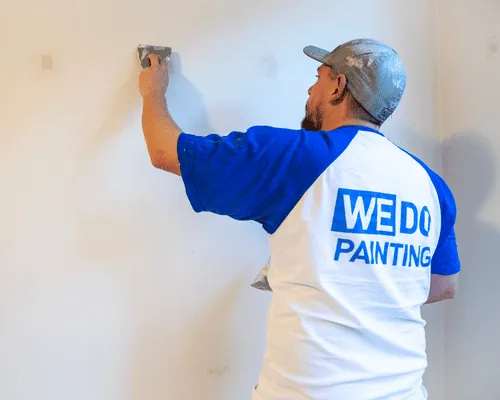
Start by removing all loose and failing paint. A paint scraper works well for most walls, trims and timber surfaces. The goal is not to strip sound paint for no reason, but you do need to remove everything that is no longer bonded. If you leave weak edges behind, they can telegraph through the new finish or lift later.

Once the loose material is off, sand the edges so the transition between bare substrate and existing paint is smooth. This step makes a big difference to the final appearance. If the edge is sharp, it often shows through even after patching and repainting.

After sanding, clean the area properly. Dust, grease and residue reduce adhesion. In kitchens and commercial settings, washing the surface can be just as important as sanding it. Let it dry fully before moving on.

Then assess the underlying surface. If plasterboard is soft, timber is swollen, or exterior render is cracking, painting is only part of the job. The substrate may need repair before any primer or topcoat goes on. This is where many DIY jobs fall short – the visible coating gets attention, but the actual surface problem stays in place.

Repairing the surface before repainting

If the damaged area is shallow, a quality filler or stopping compound can level it out once the loose paint is removed. Apply it thinly, let it cure, then sand it smooth. For larger damaged patches, more than one coat may be needed.

Plaster repairs need a bit more care. If the paper face of plasterboard has torn, it should be sealed before patching. If water damage has softened the board, the affected section may need replacement rather than filling. Timber trims and weatherboards can also need more than filler if rot or repeated moisture exposure is involved.

This is the point where a practical decision matters. If the area is small and the cause is obvious, a targeted repair can work well. If multiple walls are affected, or you can see signs of moisture, mould, widespread bubbling or repeated failure, it is usually more cost-effective to deal with the broader issue properly instead of patching the same problem again and again.

Priming matters more than most people think

One of the most common mistakes after surface repair is skipping the primer. Fresh filler, bare plaster, raw timber and sanded-back spots all absorb paint differently. Without primer, the topcoat can dry patchy and may not bond as well as it should.

Use a primer suited to the surface and the reason for failure. On repaired plaster, a sealer undercoat helps even out porosity. On timber, a quality timber primer helps with adhesion and tannin control. If stains or water marks are present, a stain-blocking primer is often the better choice.

This is also where product compatibility counts. Not every paint system works well over every existing coating. If the old surface is enamel, chalky exterior paint or an unknown previous product, choosing the right undercoat helps reduce risk.

Choosing the right paint for the area

Once the surface is sound, clean, dry and primed, you can repaint. But the topcoat still needs to match the environment. Bathrooms, laundries and kitchens need coatings that handle moisture and frequent cleaning. Exteriors need paint that can cope with sun, rain and substrate movement. Commercial areas often need a tougher washable finish because of higher wear.

A low-cost paint may look acceptable on day one, but durability is what matters. Better-quality coatings usually offer stronger adhesion, more consistent coverage and a longer service life. That does not mean the most expensive option is always necessary, but going too cheap can undo all the effort spent on preparation.

Apply the paint at the recommended spread rate and drying time. Rushing coats can trap moisture or affect curing. In cooler weather or high humidity, drying can take longer than expected. That matters in Melbourne conditions, especially on exteriors and in poorly ventilated rooms.

When the problem is moisture, not paint

If the paint is lifting around windows, cornices, ceilings or external joins, check for water entry before doing anything else. Failed caulking, roof leaks, plumbing issues and condensation can all show up as paint failure.

Bathrooms are a good example. If steam sits in the room with poor extraction, the coating can struggle over time no matter how carefully it was applied. The paint is not always the main problem. Sometimes the room needs better ventilation, repairs to sealants or a change in maintenance habits.

On exterior walls, rising damp, cracked render or timber movement can all cause repeat issues. In those cases, the painting system has to work alongside repair work, not instead of it. A good finish starts with a dry, stable surface.

Is it worth fixing it yourself?

For a small, isolated area on a sound wall, a careful DIY repair can be fine if you have the right tools and patience. The key is being realistic about the condition of the surface. If you only remove the visibly loose bit and paint over the rest, the repair may stand out or fail early.

For larger areas, high ceilings, exteriors, commercial spaces or recurring problems, professional help is usually the smarter option. The value is not just in the painting. It is in diagnosing why the coating failed, repairing the surface properly and choosing a system that suits the site.

That matters even more for property managers and business owners. A quick cosmetic fix can cost less upfront, but if the finish fails again, you end up paying twice and dealing with more disruption. Reliable preparation and clear scope save time in the long run.

A better result comes from proper prep

If you are working out how to fix peeling paint, think of it as a repair job first and a painting job second. Remove anything loose, smooth the edges, fix the substrate, prime the area and only then apply the finish coat. That sequence is what gives the new paint a fair chance to last.

Good painting is not just about appearance. It protects surfaces, reduces future maintenance and helps a property present well for longer. When the cause is handled properly, the repair looks better and performs better.

If the issue seems bigger than a simple patch, it usually is. A careful inspection now can save a much larger repair later.