How to Prepare Walls Before Painting

How to Prepare Walls Before Painting

Learn how to prepare walls before painting for a smoother finish, better adhesion and fewer defects, with practical steps that save time.

A fresh coat of paint can lift a room quickly, but the finish is decided long before the first roller goes on the wall. If you want to know how to prepare walls before painting, the short answer is this: clean properly, repair properly, sand properly, and only then start painting. Miss one of those steps and even good paint can end up showing every flaw.

Wall preparation is where a professional result starts. It affects how the paint sticks, how smooth it looks in daylight, and how well it holds up over time. Whether you are updating a bedroom, getting a rental ready, or planning maintenance in a commercial space, the prep work is what separates a quick cosmetic job from a finish that lasts.

Why wall preparation matters

Paint does not hide as much as people think. In some cases, it actually highlights dents, patchy repairs, old brush marks, grease spots and hairline cracks. Flat light can be forgiving, but strong natural light across a wall will pick up almost every surface issue.

Good preparation also helps with adhesion. If there is dust, soap residue, smoke build-up or flaking material on the wall, the paint can struggle to bond. That can lead to peeling, blistering, uneven sheen or patchy coverage. Spending extra time on preparation usually saves time later because you need fewer touch-ups and avoid redoing the job.

How to prepare walls before painting in the right order

The right sequence matters. If you sand before cleaning, you can grind grime into the surface. If you patch before removing loose material, repairs can fail. A straightforward process keeps the job efficient and gives you a cleaner result.

Start by clearing as much of the room as possible. Move furniture away from the walls, remove wall art, take off switch plates where practical, and cover floors. This gives you room to work and makes it easier to spot defects from different angles.

Next, inspect the walls carefully. Look for nail holes, dents, settlement cracks, bubbling paint, mould, water staining and signs of old patching that has sunk or lifted. This step is easy to rush, but it tells you what kind of preparation the wall actually needs. A newer wall in good condition may only need a wash and light sand. An older wall with wear and repairs may need much more attention.

Clean before you repair or sand

Walls collect more than dust. In kitchens, you often get grease and cooking residue. In hallways and living areas, there can be hand marks, scuffs and airborne dust. In commercial settings, walls may carry a layer of general grime that is not obvious until you start wiping them down.

Use sugar soap or a suitable wall-cleaning solution, following the product instructions. Wash the surface with a sponge or cloth, paying extra attention to areas around light switches, door frames and corners. Then let the wall dry properly. If moisture is still in the substrate, patching compounds and primers may not behave as they should.

If mould is present, it needs to be treated correctly before painting. Painting over it is only a temporary cover-up and usually means the problem comes back. The cause of the moisture also needs attention, otherwise the new finish can fail early.

Repair cracks, holes and damaged plaster

Once the wall is clean and dry, deal with any surface defects. Small nail holes and minor dents can usually be filled with a suitable filler or patching compound. Larger damage, including deeper holes or crumbling plaster, may need a more solid repair method and sometimes a plaster repair rather than a basic fill.

Hairline cracks are common, especially around joints and movement points, but they should not just be painted over. Open the crack slightly if needed, remove loose material, and fill it properly so the repair has a chance to hold. For recurring cracks, it may depend on whether the issue is simple movement or something more structural.

This is the point where many DIY jobs lose quality. Filler that is applied too thickly, not allowed to dry, or not sanded flush will show through the topcoat. On darker colours and low-sheen finishes, patching mistakes can stand out even more than expected.

When repairs need more than filler

Some walls need trade-level repair work before they are ready for paint. Water damage, blown plaster, damaged cornices, timber movement around trims or repeated cracking can all affect the final result. In those cases, proper repair work is part of preparation, not an optional extra.

That is often where having painters who also understand repair and maintenance makes a real difference. Fixing the cause and the surface together usually leads to a better and longer-lasting finish.

Sand for a smooth, even surface

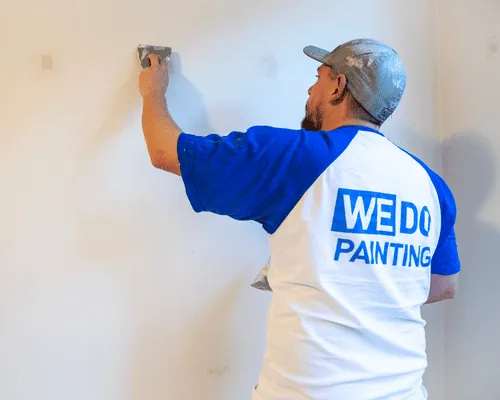
After repairs have dried fully, sand the walls to level patching and remove minor surface imperfections. You are not trying to strip the whole wall back in most cases. The goal is to create a smooth, even surface with enough profile for the new coating to bond well.

A light sand over previously painted walls can help remove rough spots, old roller lint, and edges around repaired sections. Pay attention to patched areas because they need to blend into the surrounding surface, not sit proud of it. Run your hand across the wall as well as checking it visually. Your hand will often pick up defects your eyes miss.

After sanding, remove dust thoroughly. Vacuuming, brushing down and wiping with a damp cloth can all help. Leaving dust on the wall is one of the simplest ways to compromise the finish.

Deal with peeling paint and glossy surfaces

If old paint is flaking or peeling, it needs to come off. Painting over unstable material only covers the problem for a short time. Scrape back loose edges, sand the transition smooth, and make sure the surrounding surface is sound.

Glossy walls, trims, and surfaces painted with higher-sheen products can also need extra attention. Paint sticks better when the surface has been dulled and prepared properly. In some situations, a dedicated primer is the safest option, especially when changing from old enamel finishes or dealing with difficult surfaces.

Prime where needed, not just out of habit

Primer is not always required across every square metre, but it is often essential in key areas. Fresh patching, bare plaster, repaired sections, stains, and problem surfaces usually need a suitable primer or sealer. This helps even out porosity so the topcoat dries more consistently and covers better.

Without primer, patched areas can flash through the paint, meaning they show as dull or different in sheen even if the colour matches. Stains can also bleed through if they are not sealed correctly first.

How to tell if a wall needs primer

If the wall has multiple repairs, bare spots, stains, or a big change in surface type, use primer. If it is a clean, sound, previously painted wall in good condition, a full prime may not be necessary. This is one of those it depends situations where the condition of the substrate matters more than a one-size-fits-all rule.

Check the room conditions before painting

Wall preparation is not only about the wall itself. Temperature, humidity and ventilation affect drying times and the way products perform. If a room is too cold, too damp or poorly ventilated, fillers, primers and paint can all take longer to cure.

This matters in bathrooms, laundries, kitchens and commercial areas with limited airflow. Rushing the next step before the previous one is dry can cause dragging, soft spots or adhesion issues. A good painting schedule allows prep materials to cure properly rather than forcing the pace.

Common mistakes that ruin the finish

The most common problem is underestimating how much prep is needed. People often assume paint will cover dirt, disguise poor patching, or smooth out old defects. It rarely does.

Another mistake is spot-filling visible holes but ignoring the rest of the wall. Once new paint goes on, old scuffs, picture hook marks, dents and previous repair lines can suddenly become obvious. Looking at the whole wall under decent light before painting is worth the effort.

Using the wrong filler or skipping dust removal also causes trouble. So does painting over active moisture issues. If there is staining, bubbling or mould, preparation needs to address the source as well as the surface.

A practical standard for a better result

If you want a wall to look properly finished, aim for this standard: clean surface, no loose paint, repairs flush to the wall, dust removed, and primer used where the substrate calls for it. That applies in homes, offices, shops and larger facilities alike.

The real value of proper preparation is not just appearance on day one. It is fewer defects, better durability and less chance of callbacks, touch-ups or early repainting. That is why professional painters spend so much time on prep before opening the first tin.

If your walls have more than a few minor marks, or if there is cracking, peeling, water damage or worn plaster involved, getting expert advice early can save time and money. A paint job always looks better when the surface underneath has been prepared properly, and that is the part worth getting right.